Hello Lovelies.


 Step 6: Optional, but not for me...I add my doodling to my card base. This is the best time to do this part because your card will begin to bulk up and your lines might get off and not look as nice if you wait.


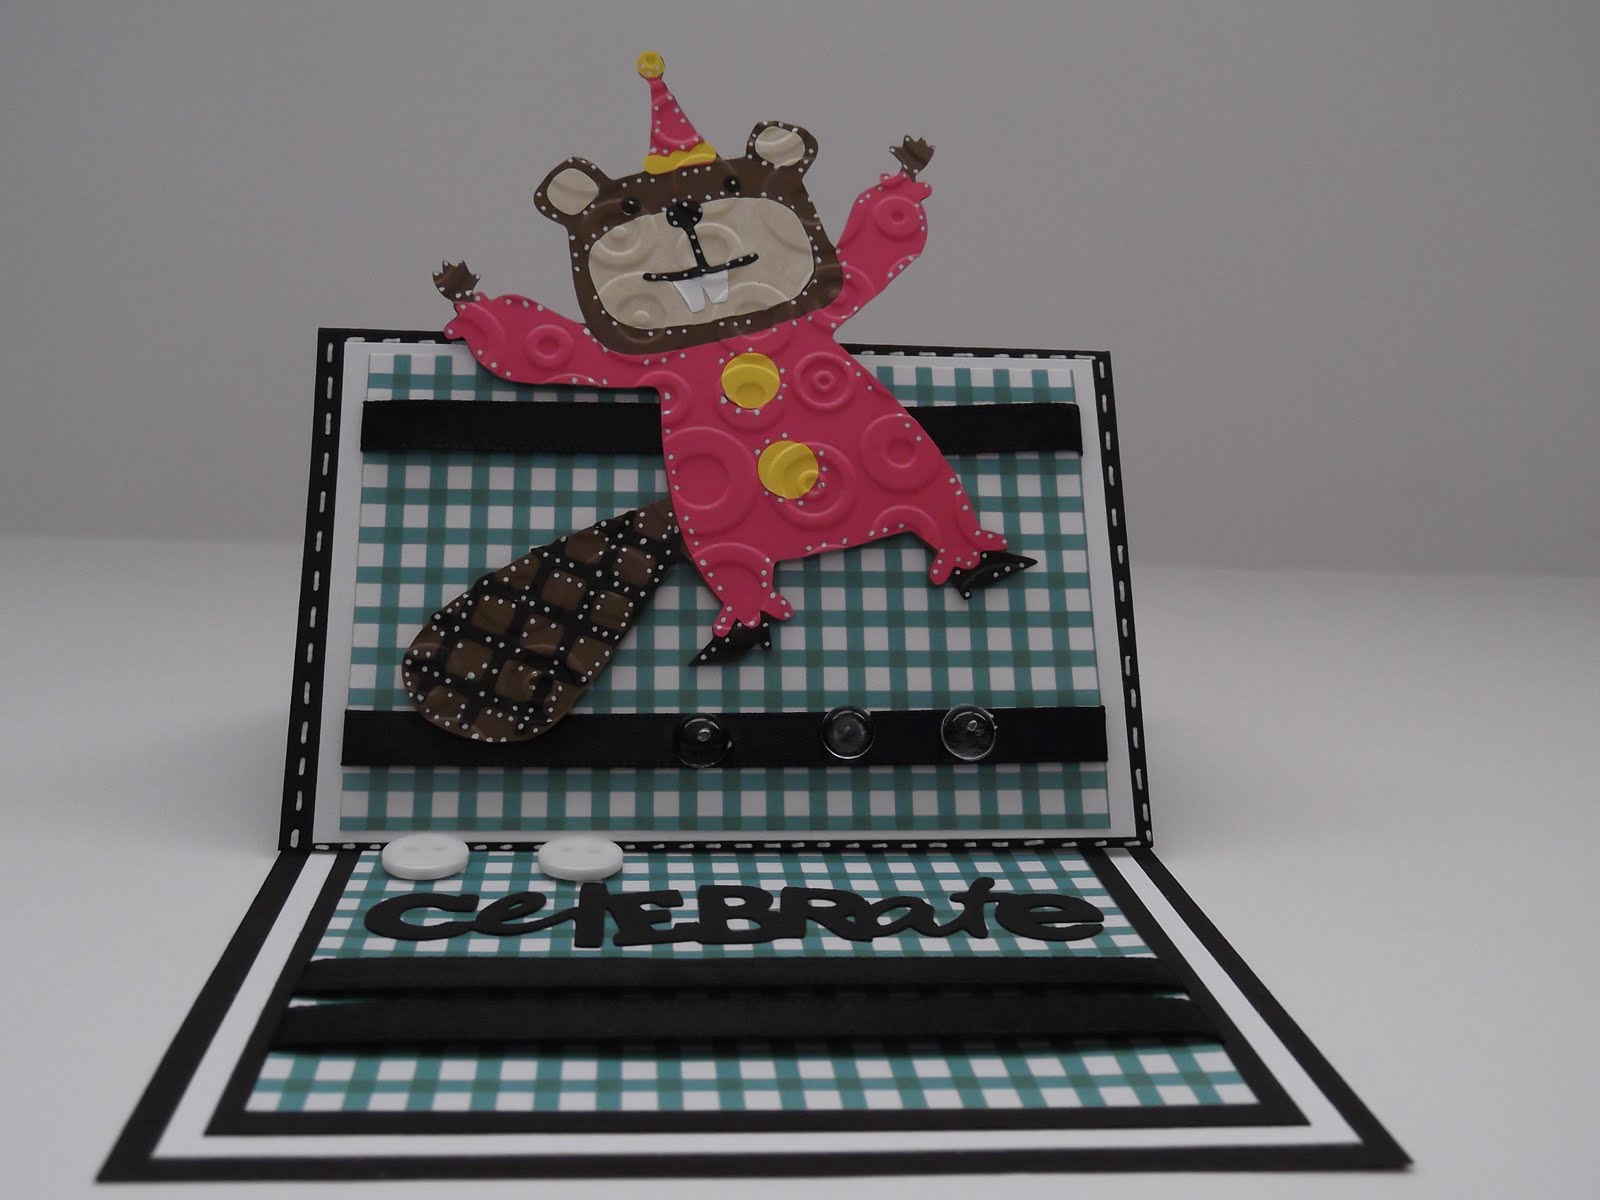
I have another card to share with you today. I used the Birthday Bash cart and KI Memories patterned paper on this one. I am sharing the tutorial with you also because I was asked to do so by a very good friend. Let me warn you ahead of time, this post is super duper long and picture heavy. Thanks for the visit and have a FABULOUS day!
Hugs,
~Shen

Step 1: Start with a sheet of 4 1/4 by 11 sheet of cardstock

Step 2: Score at 2 3/4 and 5 1/2

Step 3: Decide how you want to mat your card, you will need (2) identical mats. My card has a white mat cut at 2 1/2 by 4 and the turquoise mat is cut at 2 1/4 by 3 3/4.

Step 4: Adhere your mats to your card base.

Step 5: Cut your inside mats. My white mat is 4 by 5 1/4. and the black mat is 2 3/4 by 3 3/4, the turquoise mat is 2 1/2 by 3 1/2.


Step 7: You are going to want to set your card up like the picture and if you haven't already, cut out your Cricut cuts or whatever elements you will be using on your card. This step allows you to lay your card out and find out where you want your images to be placed on your card and where to place your pop dots on your images.
Step 8: This is where you begin to embellish your card and add the easel part of the elements you desire.

Step 9: Lay your card out flat into the A2 orientation and continue to embellish and add the elements you desire.

Step 10: Set your card up and admire your awesome hard work.
Thanks for sticking with me to the end. This is my first blog tutorial and I wanted to make sure that everyone understood. Teaching Secondary Math is a lot easier than this but we got it done. I hope everything was clear. Again, this is not my original easel card technique...I was blog surfing as usual and for the life of me, I can't remember the name of the blog where I saw this but here is how I did the Apple Easel card a week or so ago and if you have any questions, please do not hesitate to ask.
Thanks again for hanging around.
Hugs,
~Shen


Fantastic tutorial! Thanks. :) PLus that card is just too cute. Always love your embossing.
ReplyDeleteYour tutorial was absolutely perfect and easy to follow, Shen! GREAT job!! And of course the card is so fabulous! I am following your Step 10 right now and admiring your awesome hard work :D
ReplyDeleteLisa
Hi Shen,
ReplyDeleteThanks for the tutorial, it's great as is your easel card, I am hoping someday I will be able to create something nice with my Cricut, but alas I am still at the very begining stages, lol.
Take care
Judie
Very cute! Thanks for the tutorial!
ReplyDeleteThis is an ADORABLE card and a FANTASTIC tutorial! Thank you so much for doing this- I have never made an easel card- so I guess now that I have the instructions, I'm going to have to try one! You rock! :)Amy
ReplyDeleteWhat a fun card! I love the colours against the background paper. Thanks for the tutorial too. It's so interesting to see the card in progress!
ReplyDeleteWonderful easel card. Great cut and great tutorial! TFS!
ReplyDeleteSherrie K
http://sherriescraps.blogspot.com
Your card is so adorable.
ReplyDeletePerfect tutorial.
Easel cards seem to be my favourite right now :)
I always wanted to know how to make one of these! I will have to give it a try! Thanks for making this tutorial :)
ReplyDeleteMaribel
Super cue card! Great papers and details!
ReplyDeleteCarri~abusybee
www.doubleclickconnections.blogspot.com
What a great tutorial...and super super cute card. hugs
ReplyDeleteShen this is a really cute card! I am really glad you stopped by my blog and saw I had some awards for you. Also glad you did this tutorial. I do easel cards but I do them different, this looks easier:)) I haven't felt good but as soon as I do I will try this way. Thank you Love, Hugs, Pam at http://craftycards4u2.blogspot.com/
ReplyDeleteHi Shen, what a fun card!! Thank you for the tutorial:) Very cute card.
ReplyDeleteHugs
Super cute card, and a great tutorial!!!
ReplyDeleteOh lovely Shen. I think it looks all the more beautiful if we know how its made. A delightful tutorial
ReplyDeleteCheers
Sonia
http://cardsandschoolprojects.blogspot.com
awesome job!
ReplyDeleteLovely card Shen and great tutorial.
ReplyDeleteJayne x
Love it!
ReplyDeleteGreat tutorial. I'll be posting a different take on an easel card to my blog sometime this week.
ReplyDeleteWonderful card, Shen! Thanks for the awesome tutorial. It made perfect sense.
ReplyDeleteKelly
http://kellyscraftylife.blogspot.com
Great job on the pic tutorial. Love that juggler
ReplyDeleteHey Shen!! I think you like Birthday Bash as much as I do...I really use it for the banners, I am crazy for banners!!! You did an absolutely wonderful job on your step by step tutorial. I like easel cards and I have yet to make one...maybe I'll give it a try. Be Blessed!!
ReplyDeleteHi Shen,
ReplyDeleteThis is just too cute... I enjoy making easel cards too. It's sooo much fun.
Hugs,
Rez
http://karezmakreations.blogspot.com/2011/05/alohas-sweet-blog-candy-giveaway.html